

Hello everybody! I’m going to dive deep into music visualizations for festivals. As you might know these are very graphically complicated with visual effects like shaders and use of PCG.
My original concept:
I started off with a vision for music visualizations for festivals, my original idea was a water/lava visualization that is supposed to look realistic but also abstract. Another idea was a space theme.
However after doing research on existing concept for huge festivals and artists I noticed that there are a lot of concepts I hadn’t thought of before. This is why I’ve decided to make a large drawing board with all kinds of examples, so I can easylie look at all the things I like and combine or extract certain principles. This is also a common practice for movies or art styles.
To start I think having a clear overview of everything that needs to be done is very important. However as Unreal/shaders/pcg is very new to me and the project goal of a music visualizer is also new I have to research the steps first and adjust along the way.
For my first sprint I will focus on asking the right research questions. But ofcourse only doing research for one week has a risk of waiting too long with just doing/creating something. So that’s why I’ve decided to follow quickstart tutorial for Unreal. Along the way I will research the differences between Unity and Unreal.
Ideally I would go from basics of unreal to more advanced shader/pcg practice however this might not be doable in 1 week. Another idea is to recreate my unity shader assignment in Unreal however I should probably do a simple shader/pcg tutorial for Unreal first.
Research:
- Difference between Unity and unreal c++ vs c# ?
- Difference between shaders in unity and Unreal ?
- Difference between render pipelines Unity/Unreal ?
- Unity 5.3 new version research benefits ?
- role of blender for combining with unreal
- How do others extract audio data for visualizations? Both video visualizations as well as more advanced festival visualizations. ?
- research unique visualizations like; making it appear outside of a screen or project onto a 3d box.?
Week 1: Think Make Check
Creating an Audio Visualization; My Experience, with Unreal Engines Niagara System week 1.
Introduction
Music festivals provide a captivating experience by combining visual elements to create an unforgettable atmosphere. This week starts my journey on learning Unreal Engine, which I have been wanting to do for a long time. Now finally being able to dedicate 40 hours per week to develop in Unreal. I first had to think what do I want to create? Something else that’s new for me but I really enjoyed is the PCG and Shader assignments during the bootcamp last weeks. I have always been interested in abstract art and audio visualization so that is how this project came to be. In this report I will delve into the steps I took, the research involved, and the complete TMC (Think Make Check) cycles that made me rethink my steps and adjust my method of learning and doing based on feedback from my guild, VJ’s and graphical artists, and user tests.
Think
Establishing Quality Criteria
Prior to starting the project I had a vision of what I aimed to accomplish;
- Creating audio driven movements.
- Incorporating appealing particles/shaders and other effects.
- Synchronizing effects/shaders with the audio.
- Developing a music visualizer suitable for festivals (although this aspect was only partially achieved this week)
Research and Exploration
It became clear from research that Unreal is an up and coming tool for music visualisations that more and more expert are beginning to use, the most common software is touch designer but this offers less customization however it is more accesible for beginners and non-programmers.
To fill in my knowledge gaps in using Unreal Engine I invested two days in completing a beginners course on Udemy. This foundational course proved invaluable because Unreal is different from Unity in a lot of ways. Equipped with this g I then turned to Sem Schreuders guide on synchronizing visuals with audio, in Unreal Engine. This video provided an exploration of how to create visualizations using the Niagara system.
Design Plan
After conducting research I outlined a design plan as follows;
- Start by building upon the knowledge gained from CorebGames project.
- Integrate input. Synchronize it with the visual elements.
- Optimize, for performance.
- Address any compatibility issues that may arise with versions of Unreal.
Execution (or ‘Building’) based on CorebGames Foundation
Taking inspiration from CorebGames work I proceeded to enhance and customize the project further. Instead of using default sprite rendering I introduced a mesh (a cube). By adjusting particle size and increasing spawn rate my aim was to achieve a densely packed particle effect.
Appearance and Movement of Particles
To control particle movement I incorporated curl noise force while tuning parameters such, as noise strength and frequency. Additionally I set the mesh renderers facing mode to velocity so that cubes automatically rotate, resulting in a very modest movement and visualisation for now. .
Integration of Audio
The core aspect of this project involved integrating the audio module. For this purpose I developed a Niagara module script specifically designed for handling audio visualization. Input parameters included audio spectrum analysis data, normalized age information and velocity values. The velocity was multiplied by the audio amplitude while adjusting the multiplication factor to achieve the desired effect.
I used the default master submix to capture all audio, from Unreal Engine.
During the development process I encountered challenges. Unreal Engines environment differed from Unity so I had to iterate and address issues like performance. For example I had to make adjustments to the particle system in order to achieve the desired effect. decrease the water quality between 256 to 64 to find a good value. Additionally I needed to tune the integration to ensure that the visuals synchronized perfectly with the beats.
So one significant challenge was optimizing performance. As the visualizer became more complex it was crucial to ensure good performance. Moreover navigating through versions of Unreal Engine posed its set of challenges. Some tutorials that I relied on were based on earlier versions of Unreal Engine resulting in compatibility and functionality issues that required problem solving.
During the evaluation process it was essential for me to distinguish between preferences and objective results. Although I wanted to focus on making the best possible visual effects I relied on technical metrics and feedback, like fps and lag spikes to measure performance.
So the choice for a certain kind of effect directly influences the performance of the visualizer.
For example when it came to incorporating prettier or larger particle systems although they looked visually impressive they often required additional computational resources, which posed performance difficulties.
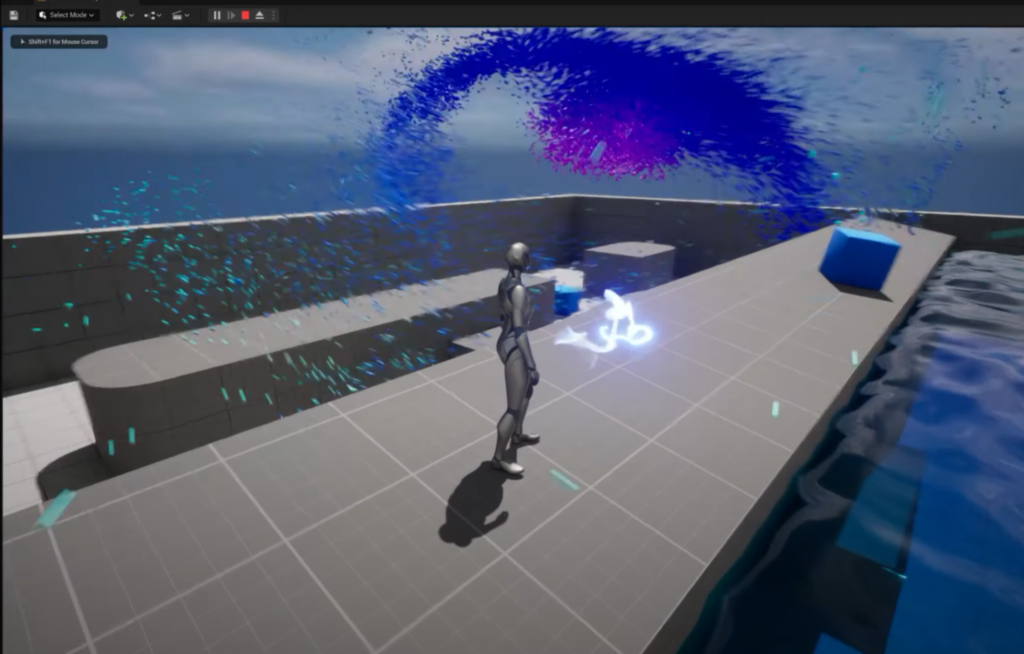
Water:

Assessing if the Outcome Meets Set Standards
The visualizations underwent exploratory testing, with friends, family and other student. Most met 3 out of 4 predetermined criteria ( with the water theme emerging as the favorite. However the realistic water like visualizer was only partially realized, leaving room for development of music synchronization.
Criteria:
- User Experience (UX) Quality: Observe if users find the visualizations captivating and if they can navigate and interact with ease.
- Synchronization with Music: Ensure visual effects are precisely timed with the beats and rhythms of the music for a coherent audio-visual experience.
- Performance and Reliability: Monitor for low latency and high stability to avoid any disruptions during live performances.
- Aesthetic and Design Quality: Evaluate the visual attractiveness and customization options to match the festival’s vibe and audience preferences.
Incorporating Feedback from the Community
The input received from friends and family was invaluable. Their insights shed light on areas that could be improved in terms of optimizing performance and enhancing visuals. This feedback was integrated into the project enhancing its quality and user friendliness like frames per second or visibility.
Assesing based on technical criteria.
The visualizations went through visual inspection to evaluate their performance visual appeal and synchronization with audio. Specific test criteria included assessing particle density, accuracy of synchronization with cues and frame rates across environments.
Conclusion
After a week of work on the music visualizer project I’ve created a start of something that is ready to enhance any music festival experience. The journey involved research, experimentation and collaboration with the community. Reflecting on this project reminds me of Unreal Engines possibilities and fills me with excitement for future improvements because right now it still is very basic.
Sources/Documentation:
https://docs.unrealengine.com/5.2/en-US/niagara-fluids-quick-start-guide-for-unreal-engine/ https://docs.unrealengine.com/5.0/en-US/niagara-fluids-reference-in-unreal-engine/ https://docs.unrealengine.com/5.0/en-US/niagara-flipbook-baker-quick-start-guide-in-unreal-engine/ https://docs.unrealengine.com/5.0/en-US/niagara-fluids-quick-start-guide-for-unreal-engine/ https://80.lv/articles/working-with-niagara-fluids-to-create-water-simulations
video tutorial niagara:
Unreal beginner course on udemy:
https://www.udemy.com/course/unrea.l-engine-5-the-complete-beginners-course/
Week 2 TMC R&D Music visualization:
Environment Theme, Genre & Tweaking and Dynamic Camera Control in Unreal Engine
Introduction
For this week after getting the feedback I should pick a theme I have researched multiple common themes for festivals like Gladiators, nature or gore. My aim is to construct a visual environment that seamlessly blends with the musical journey, transitioning from a tranquil nature scene and transitioning intuitively into a vibrant sci-fi arena, enriched with advanced visual effects as the musical intensity escalates.

In the initial stages, I integrated bird simulations to embody a natural atmosphere. While the potential to synchronize their movement with the music exists, I opted to retain simplicity in this phase, directing my focus on refining the core music visualization currently in place.

Subsequently, I began exploring the camera sequencer in Unreal Engine. Unlike my first prototype, where I utilized a standard player for navigation, I recognized that an authentic music festival visualization might benefit more from a musically-responsive camera. This realization led to the creation of a sequencer for the camera, orchestrating distinct visual segments corresponding to different parts of the music – the build-up, middle, and ending. While these segments are static for now, there’s potential for them to be uniquely crafted for each song in the future or dynamically activated by a VJ like commonly done at festivals between effects.
Here is an image of the sequencer I worked on where I focused on matching it to the music.

For the meticulous tweaking of visual effects and pinpointing the precise musical sound I aimed to visualize, I created a direct audio connection from my PC to the Unreal application. This strategy significantly streamlined the testing process, allowing me to explore various songs, styles, and effects with ease before committing to a specific genre. After thorough discussions and reviewing my 14 page mood board with my colleagues, a decision was made regarding the thematic environment and effects to be utilized. Another decision regarding the final music style, or rather which music style i will focus on together with the theme was made clearer but not yet set in stone on a specific kind of edm.
After tweaking a lot has changed although not easylie visible from just pictures. For example the total spread of the particles has been decreased, except when the beat feels like it’s in slow motion, then the total spread distance is increased. Also the way the audio spectrum data manipulated the velocity and distance was tweaked to make it clearer from close by. This makes it easier to look at overall as you can see in the images:

Think Make Check
I started by imagining a journey from a calm, natural scene to a lively, sci-fi setting. I thought about how to mix the visuals with the music and what different sights and sounds might do together. I created the first version of a moodboard while trying tio think of good ways to implement this fully.
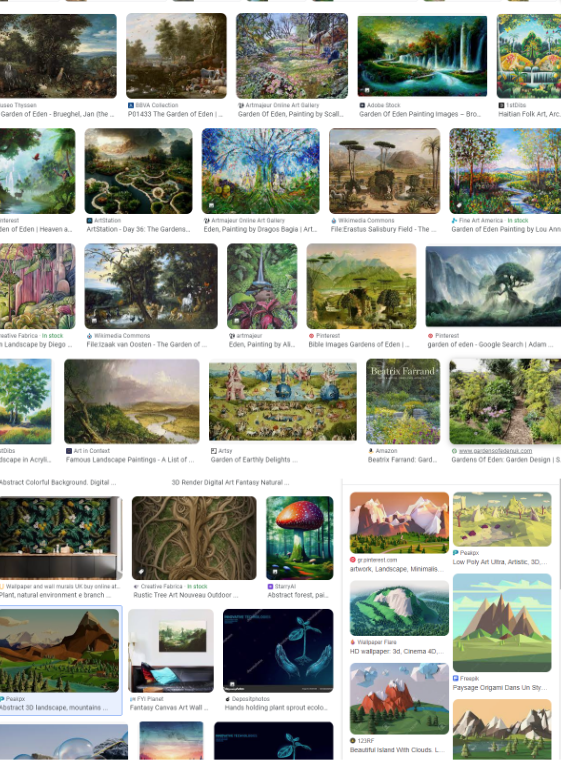

source with plenty of examples: https://docs.google.com/document/d/1Jm9WbOYwCUYoxjUbosXKpu7yvT4DNUXAUKNUY_VyRfA/edit?usp=sharing
Make:
Next, I added birds to show a nature scene and used a camera tool in Unreal to give different views of the music parts (like the start, middle, and end). I also connected my PC audio to the Unreal app to easily try out different songs and effects. This process involved a lot of testing and checking with multiple music styles and multiple settings for the music visualizer. (*note: adding picture of the Niagara unreal visual system when unreal boots up again)
Check:
Lastly, I talked with my team after showing them my mood board to make sure the theme and future effects visualizations i chose fit well with my first and future ideas.
Deep Dive into Technical Implementation
1. Bird Flight Simulation
Bird flight simulation was implemented to enhance the natural atmosphere of the visual environment. The birds’ movement was synchronized with the music, ensuring a seamless blend between the visual and auditory experience.

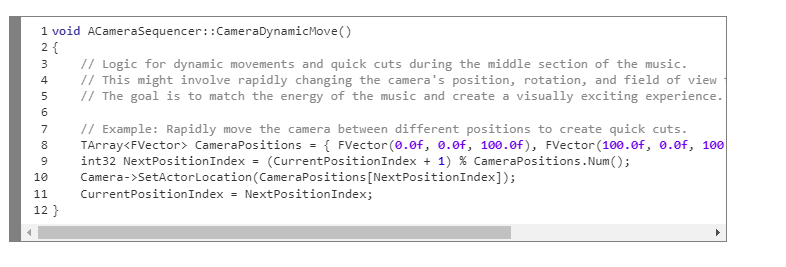
2. Dynamic Camera Control Logic
The camera control logic is pivotal for creating a dynamic and immersive visual experience that aligns with the musical journey.

Detailed Camera Movements activated through code
- Build-Up Section: Slow Pans and Zooms
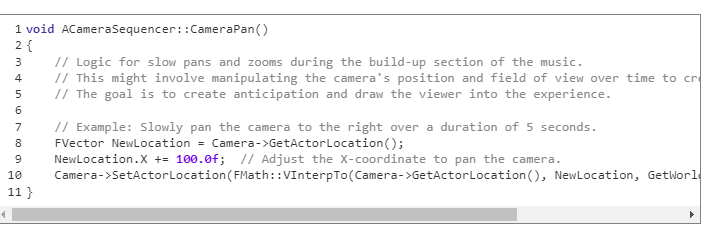
- Middle Section: Dynamic Movements and Quick Cuts
- End Section: Gradual Slows and Fade Transitions

Conclusion
Through meticulous tweaking of visual effects and pinpointing the precise musical sound to visualize, a thematic environment was crafted, ensuring a seamless blend between the visual and auditory experience. The journey from conceptualization, through technical implementation, to refinement, was navigated with a lot of research and discussions with peers. Wnsuring a visually and audibly harmonious experience. However this is just a starting point of the musical journey, through adding more environments and tweaking the visual effects and adding more visual effects this music visualisation will be able to transition to multiple themes. For example giving the birds colours or changing the way they fly when music hits would also create a realistic effect where the birds either dance to the music or get ” blown away” by sound waves like the wind.
I’m really curious what suggestions and feedback my guild has on this and after this I’m hoping to move forward with Fmod(audio to data tool) and other more advanced visualization and audio techniques.
Week 3 Report
Introduction
During Week 3 I refocused on niagara vfx and made clearer progress in my journey to create captivating visualizations, for music festivals. Taking into account the feedback I received in Week 2 of wanting to see cooler effects I dove into the Unreal Niagara system again. By combining the power of niagara in Unreal and past insights I crafted a visualisation with a lot more interesting niagara effects which do not react to music yet but I first want to ask for feedback which effects I should make react to music live.
Exploring the Depths of Niagara
Building on the feedback from Week 2 I delved deeper into Niagara, Unreal Engines visual effects editor. The modular nature of Niagara allowes me to achieve behaviors in different ways, by just tweaking a few variables the entire visualisation might change. Also incorporating the feedback drove me to create an immersive and dynamic representation.
Creating a new narrative; An Epic Musical Adventure
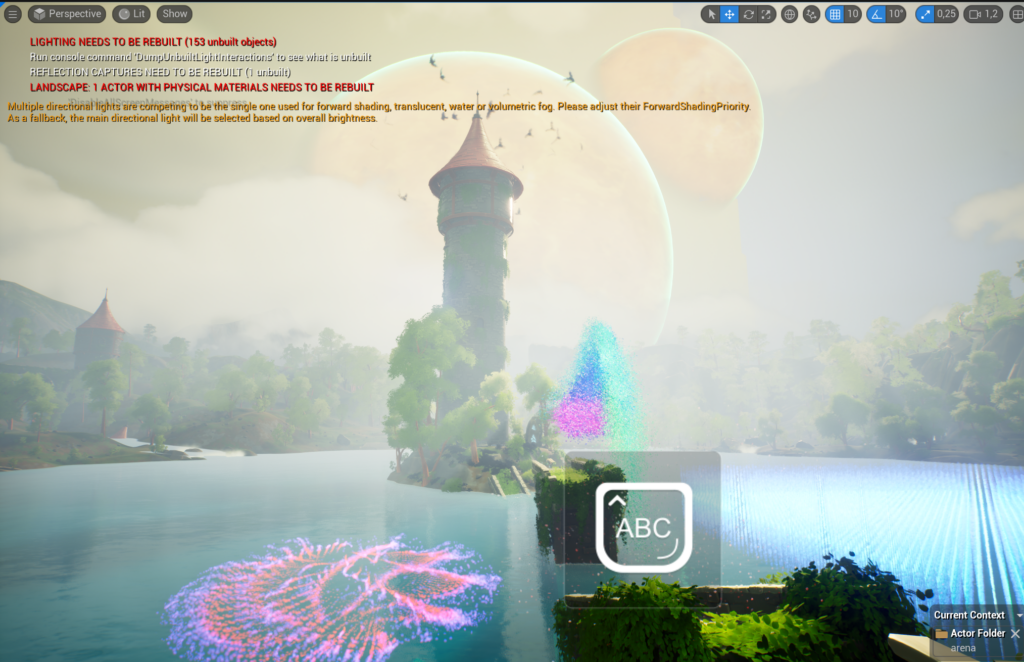
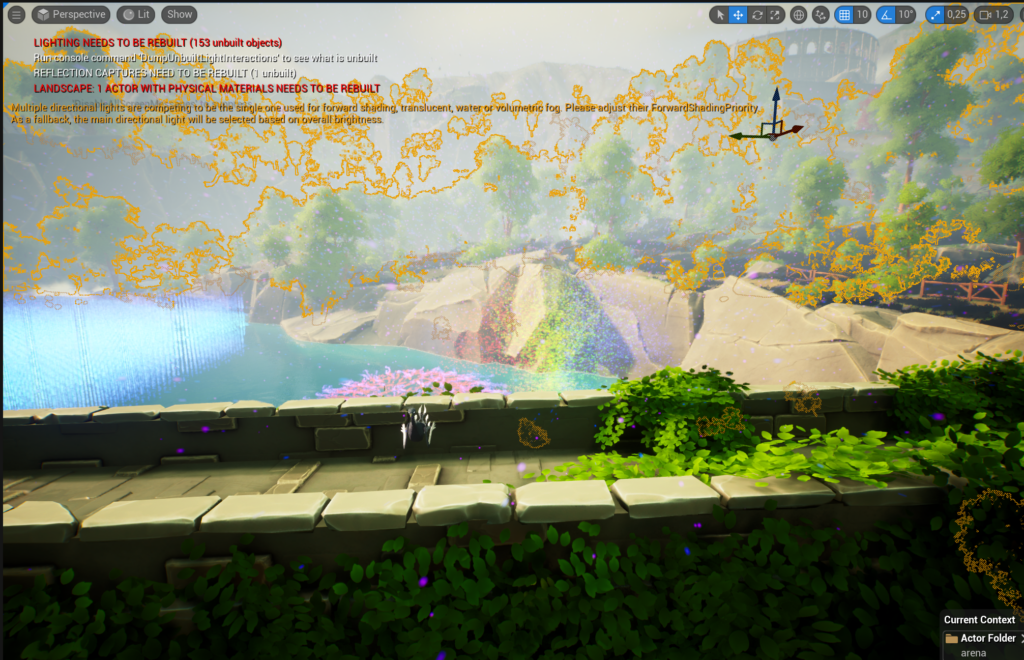
a. Nature. The Beginning
I took inspiration from the feedback received in Week 2 to enhance my portrayal of nature as the prologue of the story. Based on this input I added foliage, water effects and atmospheric changes that for now look a little out of place but will look better when it reacts to music and fits with the next environment I want to create (probably space).


b. Gladiator Arena. Reaching a Climax
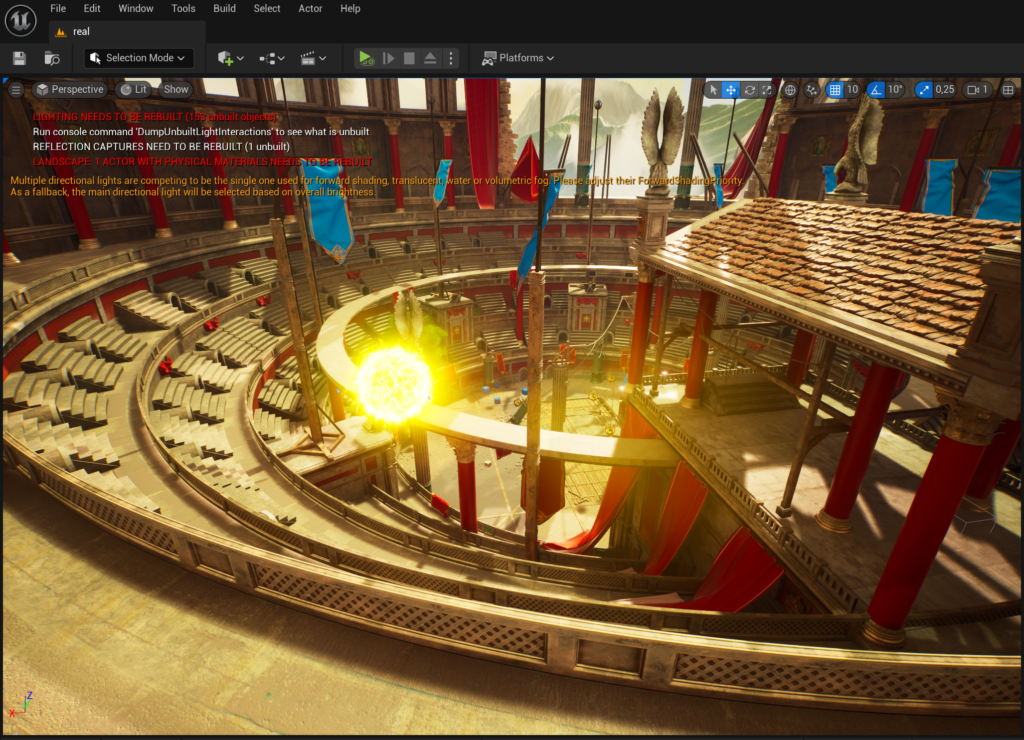
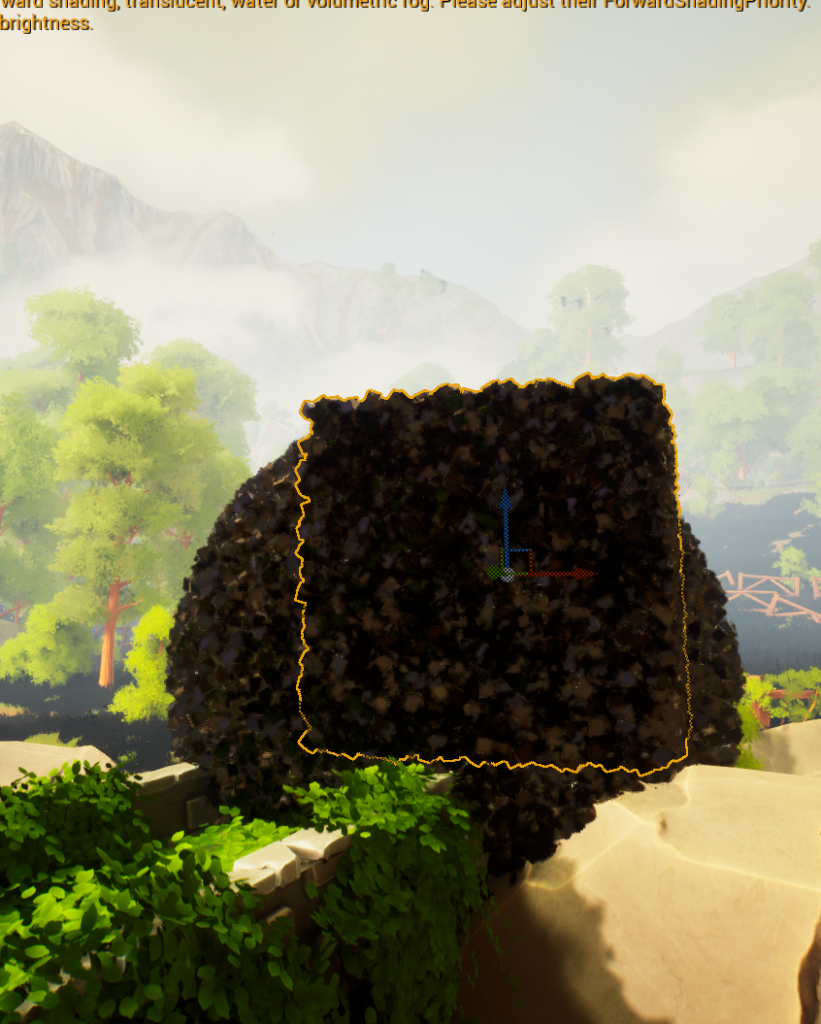
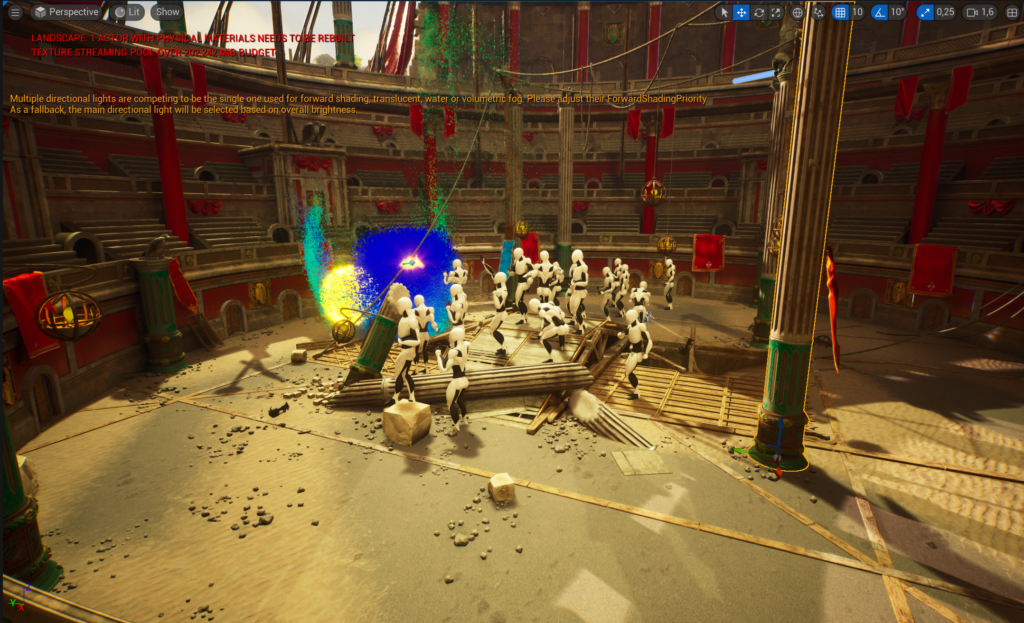
The Gladiator Arena holds significance within our narrative. It was refined based on the feedback, from Week 2.
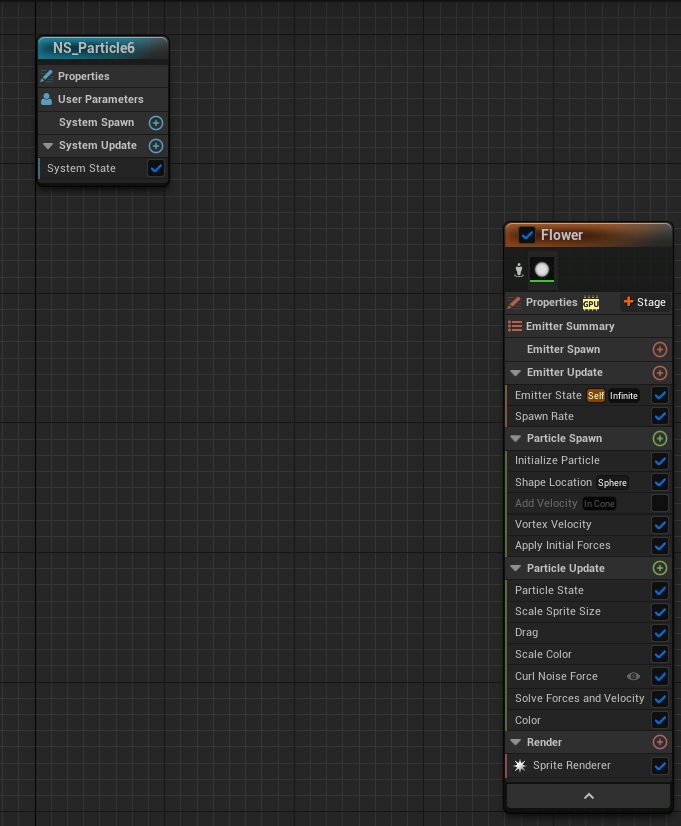
This venue now serves as a tribute to the themes of most festival. I also made the transition smoother by incorporating cues to guide the audience seamlessly. Here is an example of the implementation of the space flower/hole next to the bridge using multiple forces like curl noise force, but also the vortex velocity is a very important detail which creates a swirl/vortex effect.
c. Magic/Space. The Enchanting Finale
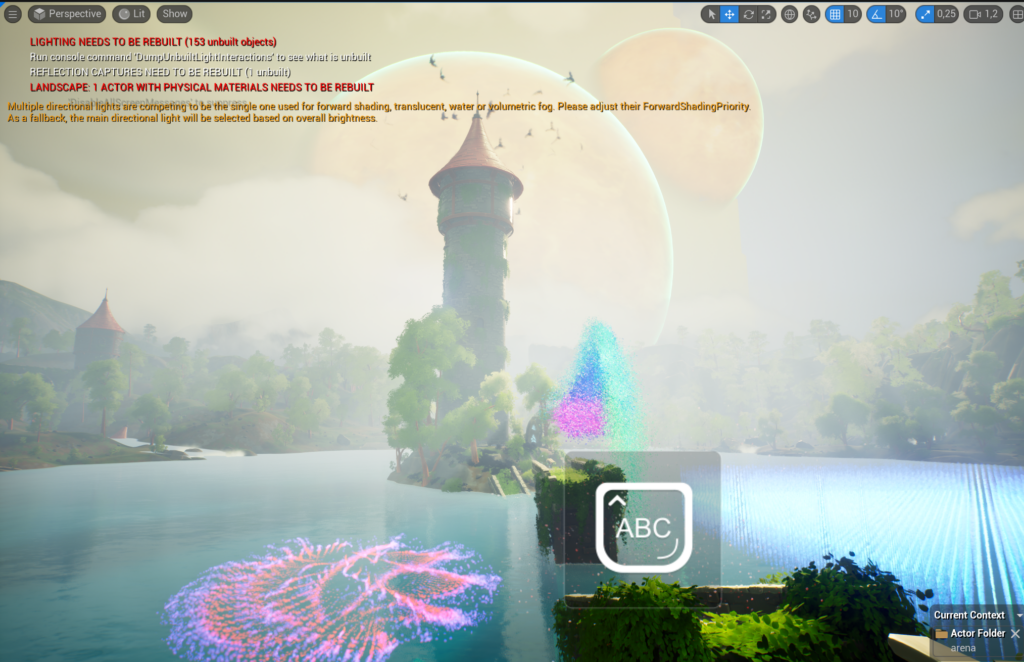
The feedback I received in Week 2 played a role in refining our portrayal of the universe ensuring that it truly captured the timeless essence of music.
Addressing Feedback and Implementations
a. Interaction between Visual Elements
We delved deeper into exploring how visual elements interact with music even when not directly being audio driven yet. In the future I want to enhance non playable character behaviors to reflect beats creating a heightened sense of realism.
b. Shader. Visual Effects
We experimented with shader particles and visual effects resulting in a layered visual experience. These dynamic alterations include more advanced visual effects like transparancy and glow which can later be tweaked to the music.
c. Versatility in Musical Styles
While we focused on an EDM style and buildup we have also implemented a system that allows for flexibility and potential adjustments to cater to musical styles in the future by exposing user valuables for the frequency and velocity.
Think Make Check (TMC) Summary
Refining Criteria; We adapted criteria based on feedback from Week 2 to target a essence.
Utilizing Feedback; We incorporated expert advice on particles, shaders and transparency elements.
Engaging with the Community; We sought input, from experts regarding visuals and narrative.
During the development phase we introduced a range of particles such, as the black “wormhole ball” , ambient effects and celestial sphere. Additionally we enhanced the gladiator arena visuals by incorporating a bird model for scene transitions.
To refine the narrative I carefully tried to make transitions to shift from nature to gladiator themes to space themes. These transitions were complemented by tailored effects that added depth and cohesion like a portal.
In terms of feedback analysis we made sure to differentiate between subjective insights from Week 2. We cross checked our visuals against criteria to ensure they aligned harmoniously with the accompanying music.
Building on the tips (feedforward) received in Week 2 Week 3 focused on exploring the interaction between elements and various musical beats and tones. Our goal was to create a visual experience by blending different shader particles and visual effects. To guide viewers through these scenes we introduced cues that smoothly transitioned them from tranquil nature settings to vibrant gladiator stadiums. Additionally we began investigating interaction with camera dynamics.
While our primary focus was on an EDM style we maintained flexibility in order to accommodate adjustments in the future. Lastly we initiated tests involving audience demographics to ensure appeal.
Conclusion
Week 3 was a turning point for me as I broadened my range of effects and laid a solid groundwork for future integrations. Using Niagara technology, I developed a range of effects and visualizations that pushed the boundaries of what I had done before.
At this stage, the integration of cooler working audio reactive effect remains a work in progress. I’m still fine-tuning how it will weave into the existing effects and make it have a clear theme and storyboard. A significant portion of my time this week has been devoted to conceptualizing the design and narrative to ensure that, once the music is added, the result will be a seamless blend of sight and sound. As I progress, my objective is to fuse these elements together, creating a multisensory journey that really resonates with the listener by fitting with the music.
Sources
Sources
- Unreal Engine. (n.d.). Niagara Fluids Quick Start Guide for Unreal Engine. Retrieved from Unreal Engine Documentation
- 80 Level. (n.d.). Working with Niagara Fluids to Create Water Simulations. Retrieved from 80.lv
- Udemy. (n.d.). Unreal Engine 5: The Complete Beginner’s Course. Retrieved from Udemy
- “Niagara Visual Effects | Unreal Engine Documentation.” Unreal Engine. Link
- Jones, D. (2019). “The Psychology of Music: Why Music Plays a Big Role in What You Feel.” Link
- Martin, G. (2021). “The History and Evolution of Music Festivals.” Link
- UE5 Niagara Basic | Local Space – World Space | #3 https://www.youtube.com/watch?v=ITaNGdbYuvc&ab_channel=CGHOW
- https://www.youtube.com/watch?v=04k9JDx-KTM&t=8s&pp=ygUUdWUgbmlhZ2FyYSBwYXJ0aWNsZSA%3D
- Learn This UNREAL 5 NIAGARA Particle Sim! UPDATE
- https://www.youtube.com/watch?v=hcGDnIqXlXw&ab_channel=Mr.Hollt
Week 4: Refocus from too much potential of the Niagara tool to a clear goal, and defining a “Well Thought-Out” Visual Narrative: Insights from User Testing
“After looking over the grade and feedback from last week, it was clear that I might have gone a little overboard with all the cool creative possibilities Unreal’s Niagra had to offer. The feedback hit home: I needed to narrow down my focus and establish a clear direction. Up until that point, I had been experimenting with a bunch of different effects, but they just didn’t fit in the scene properly yet, and they weren’t yet reacting to the music as I had planned.
So, I hit the books (and the online forums) to figure out a game plan that would serve two purposes: get better at using Unreal’s other features than Niagara and make an awesome music visualization. The game plan was to put a pin in the random effects and concentrate on a cohesive and clear goal. This meant going deeper into Unreal’s toolkit—really getting the hang of camera moves, figuring out the nuts and bolts of blueprints, dabbling in C++ programming, working with the UI, and nailing the lighting.
Taking this new route felt a bit iffy at times. It’s tough to push aside the immediate wow-factor of special effects for the steady progress of honing your skills and building a story. But now that I’m on the other side, I can see it was the right move. It helped me stick to what I initially set out to learn and definitely beefed up my overall Unreal skills.
Diving into Unreal Engine
My initial encounters with Unreal Engine were challenging. As a beginner, the complexity of the software was immediately apparent. The camera sequencer, essential for syncing visuals with the rhythm of the music, demanded precise control and an understanding of cinematic techniques I had yet to master. This component alone required hours of meticulous experimentation and scene rendering to produce the seamless outcome I envisioned.
Mastering Lighting and Rendering
The lighting system in Unreal Engine is sophisticated and nuanced. It quickly became clear to me that to create an atmosphere that could carry the narrative, I would need to study the interplay of light and shadow. This entailed repeated attempts at rendering—each session extending over three hours—as I experimented with different settings to achieve the right emotional tone for each scene.
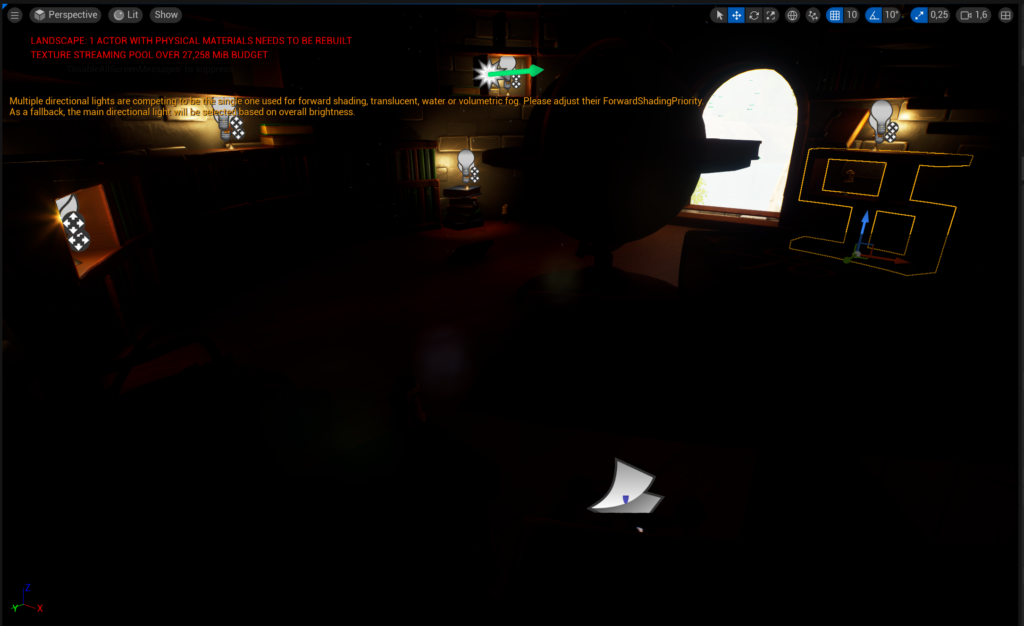
My journey through Unreal Engine’s lighting system became particularly interesting when I stumbled upon a new error message: “Multiple directional lights are competing to be the single one used for forward shading; translucent materials might not be lit as expected, please adjust their ForwardShadingProperty.” This error message shed light on the delicate balance required in the lighting setup. It forced me to delve into the technical documentation and forums to understand how to resolve conflicts between multiple light sources, especially when dealing with forward shading and translucency, which are vital for achieving realism in lighting effects. The time invested in troubleshooting this issue taught me invaluable lessons about the engine’s lighting system which ultimately helped in sculpting the visual mood and enhancing the overall narrative.
Navigating Node-Based Programming
The foray into Unreal’s node-based programming presented a significant learning curve. This system is the backbone for creating complex visual effects that could react dynamically to the soundtrack. It required a new way of thinking about visual scripting, demanding both logic and creativity to manipulate the nodes effectively for the desired visual outcomes.
Synchronizing Sound with Wwise/FMOD and Niagara
Incorporating immersive audio required leveraging the capabilities of Wwise and FMOD. However, the real challenge lay in harmonizing these tools with Niagara’s visual effects system. The synchronization had to be precise; any misalignment between audio and visual elements would break the immersive experience. It was a demanding process that tested my skills in both sound engineering and visual design.
Embracing Feedback for Refined Design
After my missteps in Week 3, I realized the importance of centering on a clear goal. The feedback I received wasn’t just constructive criticism—it was a roadmap to better align my efforts with the project’s objectives. It encouraged me to establish specific testing criteria and adhere to them, fostering a design methodology that was iterative and responsive to the audience’s experience.
As for aiming for that cinematic touch, I’ve come to accept that achieving all my learning goals 100% for both Unreal and Niagara and music visualisations was maybe too ambitious. Unreal Engine’s capabilities are very broad and my project did not even scratch the surface in some aspects compared to making a game with interactable elements and more code. But the goal was always about getting better, not achieving perfection. This whole process has expanded my skill set, sharpened my creative edge, and led to a project that—while it may not tick every single box I had in mind—stands as solid proof of how far I’ve come. It’s been a bigger challenge than I expected, but every step has been worth it and totally in line with what I wanted to achieve with this project.
Key Elements of a Compelling Visual Narrative
In music visualization, crafting a visual narrative that doesn’t just surprise the eyes but also resonates emotionally is crucial. Drawing from user feedback, I aimed to understand the essential elements of an engaging visual narrative.
I had a lot of different ideas for multiple music style and both completely live as well as controllable and editable with cool transitions. However i set my scope a lot higher than I realised when I struggled with FMod and Wwave and would be simple things in the Unreal editor like lighting and some blueprint functions. So I decided to focus on 3 parts that are often important in music visualizations with a more cinematic like experience.
Flow: A strong narrative moves smoothly, guiding viewers from one scene to the next, forming a cohesive story.
Alignment with Music: Visuals should not merely accompany the music but should amplify its mood and rhythm.
Emotional Impact: Above all, a narrative should connect with viewers, evoking feelings and memories.
User Testing Criteria
To assess the effectiveness of my visual narrative, I established specific criteria. Users were asked to rate each on a scale of 1-5:
Narrative Progression: Does the story unfold logically and engagingly?
Visual-Music Synchronization: Do the visuals enhance the music’s tempo and mood?
Emotion Elicitation: Were viewers moved by the narrative?
Visual Clarity: Were viewers able to easily follow the visuals?
Transition Quality: Were scene shifts seamless and fluid?
Overall Engagement: Was the viewer’s attention held throughout?
User Feedback Insights
User feedback provided a mix of positive comments and constructive suggestions, here is a small summary:
Positive Feedback:
“I loved how the nature scene transitioned to the Gladiator Arena. It felt like a natural progression.””The visuals and music seemed to be in perfect harmony, especially during upbeat parts.”
“The Magic/Space segment was a highlight for me. It felt like stepping into another world.”
Areas for Refinement:
“Some transitions could be smoother, enhancing the overall flow.”
“At moments, the visuals seemed to lag behind the music’s beats.”
“The climax, while good, had moments where I felt a bit disconnected.”
“The space area seems unfinished and not musically interesting”
Follow-up Questions and Responses:
Q: “Could you elaborate on the moments of disconnect during the climax?”
A: “Sure, right as the music peaked, I felt the visuals were subdued. The energy didn’t seem to match.”
Q: “Were there any transitions that felt out of place?”
A: “The shift from the Gladiator Arena to the Magic/Space segment felt sudden. A smoother bridge might help.”
Q: “Any visual elements that stood out positively?”
A: “Absolutely, the added extra effects during the nature scene were mesmerizing. They really captured the essence of the song.”



Conclusion
Crafting a compelling visual narrative is a delicate balance of storytelling, music harmony, and emotional connection. My user testing approach and the invaluable feedback received have been instrumental in refining my project, ensuring my visualizations truly engage and resonate. It has definitely improved compared to the first week when i waited till the last moment to test, now I’m almost doing multiple tmc cycles within one week (+vacation) because I’m testing more often with friends and family.
Tutorials:
https://www.youtube.com/watch?v=5jHhIah8H7U
https://www.youtube.com/watch?v=D3trMpkxAFk
Crafting a compelling visual narrative is a delicate balance of storytelling, music harmony, and emotional connection. My user testing approach and the invaluable feedback received have been instrumental in refining my project, ensuring my visualizations truly engage and resonate. It has definitely improved compared to the first week when i waited till the last moment to test, now I’m almost doing multiple tmc cycles within one week (+vacation) because I’m testing more often with friends and family.
https://www.youtube.com/watch?v=5jHhIah8H7U
https://www.youtube.com/watch?v=D3trMpkxAFk
Unreal Engine Official Documentation:/
FMOD Official Documentation: FMOD Learning
McKenna, S., Riche, N. H., Lee, B., Boy, J., & Meyer, M. (2017). Visual narrative flow: Exploring factors shaping data visualization story reading experiences. Computer Graphics Forum, . https://dblp.org/rec/journals/cgf/McKennaRLBM17
Week 5 Refocus:, more advanced live visualisations and incorporating previous feedback.
This week was central to focussing more on the technical aspect of more advanced visualisations again, which I did not spend much time on last week when I refocused on a different goal. So I previously tried Fmod and WWave but found out it would take too much time and not much progress for that week, however, from interviewing a VJ who has been doing it for 10 years I got a lot of good advice on other software that can be used like Ableton, MaxMSP and Resolume. So I decided to take the little time I had left to create an additional project (ofcourse using techniques from previous weeks but this time the focus would only be on Live visuals and not on a theme or combing themes through transitions and musical narratives.)
I learned a lot from research on this topic, MaxMSP can convert any live music to midi data automatically. This was actually something I thought about creating but I’m glad it already exists, I knew there were AI’s that could generate midi from music but I didnt know there was a software that could do it live.
For my specific use case however my VJ friend and collegeue explained to me that I don’t need to buy MaxMSP since it costs 600 dollars, but I can work with either pregenerated/played midi data or use live midi data from a drum machine or keyboard. So this is what I have decided to focus on, based on that advice and subsequent research into alternatives. I could always buy the software later when I have spent more free time on these projects, since the actual implementation is the same with MIDI data.
However, while testing with users during my development cycle for this slightly altered project, I also demonstrated my enhanced ‘cinematic video with audio-reactive elements’. I have gotten a lot of feedback from more users using the previous testplan with a few improvements as it was already well thought out according to others and my research on this previously. However, I consulted another teacher about my test plan who recommended asking people to think aloud while watching, instead of afterwards, as this would elicit less restricted responses and encourage freer expression.
According to the VJ I talked to he said that the cinematic I made previously could also be used live but would require more control from the VJ at a concert or festival for transitions. I was a little surprised that he thought the environment scene would actually be an unique addition I could bring to the VJ scene.
5.1 Incorporating more feedback from users and peers on the cinematic music visualisation.
I have made a list from all the feedback I have gotten about this specific project and plan to incorporate this before Wednesday if possible. I have already implemented a lot of feedback these past weeks about transitions and fitting themes together so due to last week’s feedback which was mainly about wanting to see more live and more technical challenge I decided to focus on that because at first I did not want to risk redoing the entire project, but now that I think of it and have implemented it I’m happy to have gone down this road because this was also one of the things I wanted to learn besides Unreal itself and not just Niagara/midi.
I used a similar format for asking for feedback during the past week as in week 4. As I was showing people the project I went another direction in I did get a lot of useful feedback which I still want to incorporate before the demo if possible, however these are all points that are not especially technically challenging, so not really that worthwile for my end grade due to recent feedback on making it more technically challenging and less. But:
- To enhance the overall atmosphere and flow of the film, consider introducing multiple camera angles during the musical drop for added dynamism.
- Try incorporating a few low-angle shots from the ground looking upwards to add a new perspective and dramatic effect.
- Introduce variety in the framing with zoomed-in or zoomed-out shots to create more depth and interest in the composition.
- Smooth out the initial camera movement; there’s a noticeable jerk when the camera starts to pan that needs easing.
- For transitions between shots, instead of fading to black, cut directly to the next shot on the beat for a tighter and more rhythmic edit.
- Praise for the work done. The addition of birds around the tower and the energy ball are creative elements that enhance the visual appeal of the film.
- The transitions could be better timed with the music for a more synchronized and cohesive audio-visual experience.
- It was unexpected that the film would shift to a space scene; perhaps consider maintaining thematic consistency throughout.
I believe the most valuable feedback was the suggestion to have the first audio-reactive effect traverse the scene with the camera following its movement as I had heard it multiple times and this was ofcourse one of my goals when I started this project besides trying and exploring Unreal for the first time.
5.2 Similar music visualisation project with more focus on live and MIDI data from audio.
I already explained I learnt a lot from talking to an experienced VJ. And even though he did say that what I showed him was unique and could be used in combination with a controller and transitions, he also suggested to me to use Ableton live with Maxmsp and Resolume.
The new unique effect can be seen here: https://www.youtube.com/watch?v=EWtMO7IGYDw&ab_channel=Victor
Make: New unique Niagara effect
I started this effect in a similar way to my first effect, using my previous knowledge and testing knowledge as my think method to make something that more closely resembles the music but also making it more appealing visually based on the previous testing categories and research from chapter 4 and new scientific research on midi and music visualisation (see sources). I didn’t start from scratch; I used my previous knowledge and built upon it.
So I decided to focus on the amplitude instead of frequency data this time to make it even more clear that the visual is audio reactive, I also added more colours and ofcourse different parameters and functions for moving:
Even though I already explained a little how this works it might be useful for anyone reading this to see and understand how this is achieved. It might look kind of intuitive, at least “easier to read” than code, but it does require you to think hard on the right approach and for me drawing what would happen really helped as it put me in a different mindset than thinking like a programmer outright.

I started by creating one fountain and manipulating the spawn and update functions to create an interesting animation, Then, like before, I linked it with the audio spectrum data; finally, after duplicating it, I refined the amplitude through trial and error, instead of frequency data, to make these two effects overlap and complement each other. It was somewhat challenging to achieve a good fit since different songs have varying amplitudes, but I created variables that can be easily tweaked by the user.
Let’s quickly go over the setup again before diving deeper:
- Emitter Summary: Provides essential information and statuses for the emitter, like whether it’s active, the number of particles, etc.
- Emitter Spawn: Determines the initial burst of particles—how many and how often they appear.
- Emitter Update: Controls ongoing changes to particles once they have been emitted.
- Particle Spawn: Configures the properties of particles at the moment they are generated, such as their initial direction, speed, and more.
- Particle Update: This module is central to defining how particles evolve over time after being spawned. Changes could include alterations in velocity, size, rotation, and color, however this can of course also be combined with more complicated values like particle age or in this use case the audio spectrum data.
This is where the actual audio spectrum is manipulated similarly to the previous implementation from week 3 but with more focus on making the effect pop out when audible and make it calm while there is little music. Because I did get the feedback that even when music was not that loud it would still react a lot, but this was caused by audio being played at a low volume while still hitting those frequencies:
https://drive.google.com/file/d/16Ih7zi6-_uYu1Gu4jFgyOlxe795FinFy/view?usp=sharing

Visualising instruments using Niagara
Now to visualise certain instruments like a kick, snare, hihat and the 12 music notes in western music, ive chosen a few effects to display outside of the main visualisation effect. Each of these effects has been fitted to the type of instrument played because some sounds last longer so require a shorter duration. While for example the kick drum is a very heavy sound so I’ve added an effect that visualises a lot of impact. For the musical notes I decided to keep it simple and create 12 small shockwaves each resembling a note, this way there is a lot of live communication about the notes being played.
melody/piano:
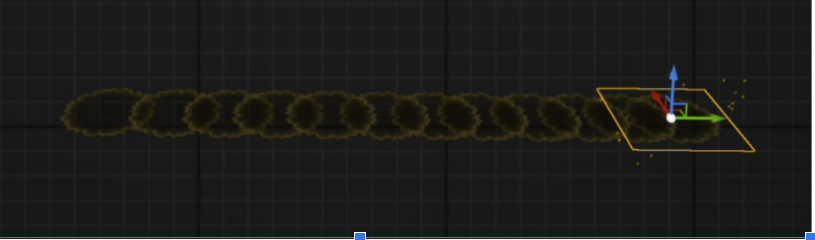
Other effects around the main music visualisation that fit and respond to the music very accurately using midi:

Figuring out Ableton with Unreal.
There are very little or almost no resources on connecting Ableton to Unreal so I decided to post some pictures explaing how to set it up. I was a little surprised that it took me quite some time to get familiar with Ableton, it is very different to the audio software I’m used to (FL studio).
Like I mentioned before MaxMSP is often used to generate midi data from songs live but this software is 600 dollars and is not within my scope untill I have more portfolio projects using midi data . Although like i said this is very similar and would be plug and play because I am connecting my drum machine and keyboard so these MIDI notes are automatically send.
First I’ll start off by explaining more in depth what MIDI data is considering a lot of people are likely not familiar with this.
It was also necessary for me to research midi and I found some great research papers on this and learned a lot I didnt know like the types of data shown below, but also how it could be used to visualise music.
MIDI, or Musical Instrument Digital Interface, is a technical standard that allows electronic musical instruments, computers, and other equipment to communicate, control, and synchronize with each other. It transmits messages about pitch and intensity, control signals for parameters such as volume, vibrato, and panning, as well as clock signals to set the tempo. Unlike traditional analog interfaces, MIDI conveys precise instructions, which can be used to recreate a sequence of notes or musical compositions with high fidelity.
Comparatively, old game controllers like those for early consoles communicated through direct, simple electrical signals, each button corresponding to a specific binary input, offering a more limited range of control and no capacity for nuanced performance data. While both MIDI and game controllers facilitate interactive experiences, MIDI’s complex language allows for a lot of expressive capabilities, similar to a digital orchestra conductor, versus the more straightforward, on-off nature of classic gamepad input.

. As you can see the drumpads are on channel 2 and the keyboard and controller knobs are on channel 1. These knobs can be used to control slider values like the camera, colours and sizes for example.
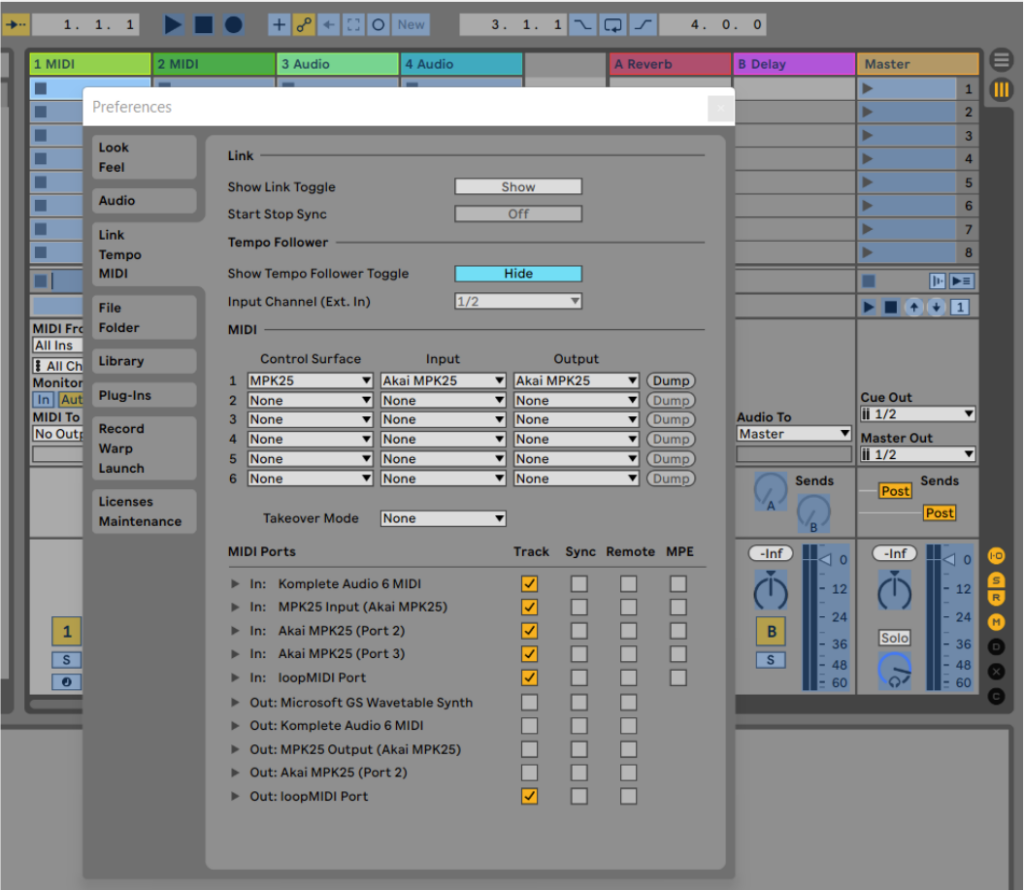
First make sure you connect a midi controller and track the input. However it is not possible to send it directly to unreal so a tool called a virtual midi device is required, I chose loopMIDI.

Size Manipulation Based on MIDI Velocity
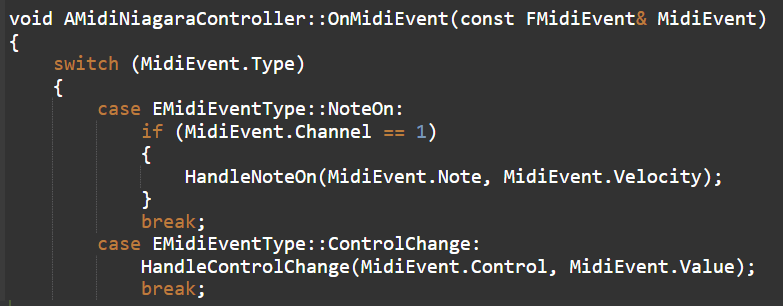
Now for making it interact with Niagara I created a simple blueprint that established a listener for MIDI note-on messages within the Blueprint. Upon receipt of a note-on message, I extracted the velocity and mapped it to a user-exposed parameter in Niagara that controlled the size and activation of the visual effect. This allows the effect to expand and contract in direct correlation with the velocity of the played MIDI notes.\

Camera Zoom Control via MIDI
To manipulate the camera zoom, I converted the MIDI control change values from a designated knob to a usable range for the camera’s field of view parameter. This allowed for smooth zooming actions, synchronized with the MIDI controller’s input.

Check & Testing
Sadly due to time constraints I did not test with as many users as I had planned to, but the feedback I did get from the 5 people I talked with was invaluable considering one used to be a VJ, and 2 of them are graphic designers. I revised my earlier testing plan by removing the categories related to narrative and progression and introduced two new ones:
Sadly due to time constraints I did not test with as many users as I had planned to, but the feedback I did get from the 5 people I talked with was invaluable considering one used to be a VJ, and 2 of them are graphic designers. I modified my previous testing plan and removed the categories about narrative and progression, and added 2 new ones also:
- Visual-Music Synchronization: How well do the visuals match the tempo and intensity of the drum and keyboard input?
- Emotion Elicitation: Did the visual effects enhance the emotional impact of the musical performance?
- Visual Clarity: How clear and distinguishable were the visual effects for each drum hit and keyboard note?
- Visual Variety: Was there a satisfying variety of visual effects corresponding to different musical notes and drum hits?
- Overall Engagement: Were you consistently engaged by the interaction between the musical input and the visual effects?
To assess the effectiveness of the MIDI-driven visual effects system I developed in Unreal Engine, which responds to drum kit and keyboard input (as well as audio loudness for the central music visualizer effect). Participants were asked to rate their experience on a scale of 1-5 for the following aspects after engaging with the instruments. Also I asked everyone to think out loud and say what comes to mind to get less “targeted” answers when these questions/categories are asked about after getting this advice from a teacher I must say it feels like people feel more free to say what they think out loud instead of holding in.
User Feedback Insights
The feedback from users provided a comprehensive view of the system’s performance, highlighting strengths and suggesting areas for enhancement, some of it was similar so I’ve summarised the keypoint here. (I recorded 3 of the interviews)
Positive Feedback:
- “The visuals for the keyboard were spot on; each note had its own effect, which created a stunning light show—4/5 for Visual-Music Synchronization.”
- “The overall loudness visualization in the center was a great touch, adding to the performance’s intensity—5/5 for Emotion Elicitation.”
- “I play in an orchestra and we often have an empty screen in the background, your idea of incorporating these kind of effects to our shows could really enhance the experience especially because all instruments are always placed in a certain position and could show the watcher where to focus on.”
Areas for Refinement:
- “The visual effects for the drumkit were clear, but during fast sequences, they tended to blur together—3/5 for Visual Clarity.”
- “For the keyboard, the effects were identical for each note; some variation would be more engaging—3/5 for Visual Variety.”
- “While the setup was visually impressive, I found myself wanting more complexity during prolonged playing—3/5 for Overall Engagement.”
Follow-up Questions and Responses:
Q: “How did the visual effects blur during fast drumming sequences?” A: “When I played a very quick drum roll, the individual lights didn’t seem to keep up, creating a less distinct visual experience.”
Q: “What kind of variation are you looking for in the keyboard effects?” A: “Perhaps different shapes or animations could correspond to different octaves or chords to differentiate the experience.”
Q: “What could make the prolonged playing more engaging visually?” A: “If the visuals evolved or changed patterns over time, it would add a layer of interest and keep the visual narrative fresh.”
Test conclusion
User feedback highlights the system’s success in syncing visuals with music and eliciting emotion, especially with the individual light effects for keyboard notes and the central loudness visualization.
However, users have pointed out areas for improvement. Visual effects for quick drumming sequences need to be more distinct, and there’s a call for greater variety in the keyboard visuals. To keep the experience engaging, especially during longer play, evolving visual patterns could be beneficial. However, all of the test users also experienced the more cinematic aspect and multiple suggested that I could perhaps merge them, retaining the cinematic project for transitions or focusing solely on the effects if played at an EDM music festival.
Conclusion
Reflecting on the project, my initial aim was to create interactive art for any music show or festival using Unreal Engine’s powerful tools for shaders and procedural content generation. The ambition was high, and the journey was rich with learning at every turn.
Each week brought new insights. Early experiments with Niagara evolved into more nuanced visual effects, then creating a lot of different effect with Niagara and followed by a more cinematic approach by the fourth week. As the project developed, the importance of prioritizing became clear. With multiple goals in sight, focusing on the most impactful ones was crucial. That is why for week 5 I decided that I could improve the “cinematic audio reactive project” to make for example the transitions be toggleable and make it fit with more music styles but I am glad I chose to deepen my knowledge on extracting midi data and using it in Niagara together with Ableton since this is the most widely used tool for this. And I did not state this at the beginnning but I did say this a few times that a goal of mine is to be able to have something I can show to a musician, which could have been a DJ or an orchestra or aything else at the very start, but I am glad i narrowed down my focus in the end while still learning not just Niagara in Unreal but also important other aspects like blueprint, c++ and the camera sequencer.
I think before starting i should’ve thought more about how much do I want to learn about unreal itself as i did feel a little lost in the software sometimes when focussing only on Niagara.
Stepping into the role of product owner and developer taught me about the significance of clarity and the challenges of communicating a complex vision. The feedback and Scrum sessions were invaluable, but they also revealed the need for clearer objectives, especially when technical challenges arose.
Building on each week’s progress, I learned the importance of targeted feedback and the art of asking the right questions to guide my project. This experience has been about more than just learning Unreal Engine and music visualisations; it was about understanding how to manage a project, set achievable goals, and articulate a vision.
Although not every goal was met, particularly the more technical aspirations for creating competing music visualisations to world renowned festivals, the project was a significant learning curve. I sadly had some setbacks when things turned out harder then I tought for example a ‘simple’ thing like lighting would’ve not required that much time. And ofcourse I spent half a week on FMod and Wwave however I felt I had to cut my losses then and refocused somehwere else. I am glad that through doing more real life research and a little web research, I was able to find out a lot about ableton and maxMSP and how to integrate this using MIDI in unreal. This info was hard to find on the web as it’s only a handful of companies that create these visualisations for large festivals according to the VJ I interviewed. Because of that knowing the correct terms was invaluable. And maybe slightly relevant to this is that I learned that for such a niche combination of software, that people are happy to talk to you about it if you share the same enthousiasm as I met someone through linkedin who did a very interesting paper on music visualisations in vr using the same tools.
Finally I have spent a lot more time than I normally would on testing as soon as possible, because I noticed around week 2 that I couldn’t explain exactly what I was testing for as the goal wasn’t that clear yet and by thinking about how visuals can be tested and researching about this I also got to know more about where I should go even though like I said previously I have learned to recheck the test questrions and make sure they don’t reinforce a certain narrative and to ask testers to say what pops up in their head.
In conclusion, this project was a practical learning experience, reinforcing the necessity of a focused approach in project management and the art of creating visuals that complement music. It’s a foundation I intend to build on for future projects because I did really enjoy learning both Unreal and Niagara music visuals however I think it’s a good sign that I would take a different approach next time as that means I’ve learned how to more clearly narrow the scope down and prioritize.
Sources.
- Rossi, M. (n.d.). A demonstration: Real-time emotionally adaptive music in a VR immersive environment Max/MSP Spat library, sensors, and Unreal Engine 5: A workflow for a real-time generative VR project. ResearchGate. https://www.linkedin.com/posts/marta-rossi-7828a1a4_pdf-a-demonstration-real-time-emotionally-activity-7120331551183134720-JkEc
(I actually had a chat with Marta on linkedin about my project ) - Ivana B. Milošević; Živanka Miladinović Bogavac; Dušan Regodić (2022). Visualization of Music – MIDI Content. https://doi.org/10.1109/icest55168.2022.9828738
- Paula Lončar (2022). Internet of Musical Things and Music Data Visualization. https://dblp.org/rec/conf/mipro/Loncar22
- Maert Mägi (2021). Interactive Music Visualization in Unreal Engine, https://comserv.cs.ut.ee/home/files/M%C3%A4gi_informaatika_2021.pdf?study=ATILoputoo&reference=6F6374018130EAF6D00128D641768E8818A2F511
- https://docs.unrealengine.com/5.2/en-US/midi-in-unreal-engine/
- https://schellgames.com/blog/the-definitive-guide-to-playtest-questions
